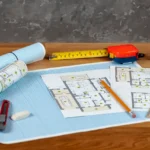
Embarking on a new construction or renovation project is an exciting endeavor for any homeowner. Whether you’re planning a new deck, a home addition, or an accessory dwelling unit (ADU), a crucial early step is creating a site plan. This document is a detailed, scaled drawing of your property that serves as the blueprint for your project and is almost always a requirement for obtaining a building permit. While the idea of creating a site plan might seem intimidating, it is a process that you can approach systematically to ensure your project gets the green light.
Understanding the components of a site plan and the steps involved in its creation is the key to avoiding costly delays and ensuring your project starts on the right foot. This guide will walk you through the entire process, from gathering essential documents to the tools you need and the final steps of submission. By following these steps, you will be well-equipped to start creating a site plan that meets the standards of your local municipality.
Step 1: The Foundation for Creating a Site Plan – Gathering Your Documents
Before you can even begin drafting, you need to collect all the relevant information about your property. This is the single most important part of the process, as the accuracy of your site plan depends entirely on the data you use.
What You Need from Your Property Records for Creating a Site Plan
Your local government’s county assessor’s office is the best place to start. They maintain records of all land parcels, including plat maps and property deeds. A plat map, or an assessor’s plat, is a record of a subdivision of land and will show your property’s legal boundaries and dimensions. Your property deed will also contain a legal description of your lot. These documents are the foundational sources for your drawing.
The Critical Role of a Land Survey in Creating a Site Plan
While public records are a good starting point, a professional land survey is the gold standard for accuracy. A land surveyor is licensed to locate and mark the precise boundaries of your property. If you have a recent survey, use it. If not, consider hiring one, especially for a large-scale project. A survey will provide you with the exact measurements you need and will include details like the location of any official easements or right-of-ways. Using inaccurate measurements from sources like Google Maps can lead to a rejected permit and legal issues down the line.
Step 2: Understanding the Key Elements for Creating a Site Plan
A comprehensive site plan is a document that tells a complete story about your property and your proposed project. It must contain specific elements that building officials will scrutinize for compliance.
Property Boundaries and Setbacks: A Core Part of Creating a Site Plan
Your site plan must clearly show the precise dimensions of your property lines. Equally important are the setbacks, which are the minimum distances your new structure must be set back from property lines, streets, and other buildings. Zoning laws dictate these distances, and they vary by city and even by neighborhood. Your site plan must show that your proposed structure will adhere to these rules.
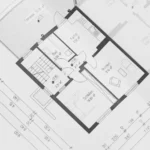
Existing and Proposed Structures: The Heart of Creating a Site Plan
The drawing must include a to-scale outline of all existing buildings on your property, including your home, detached garage, and sheds. More importantly, it must show the location and dimensions of your proposed project. Whether it’s a new deck, a swimming pool, or a home addition, the site plan must show its exact footprint and its location in relation to everything else on the property.
Utilities, Easements, and Natural Features in Creating a Site Plan
You must also indicate the location of all utility lines (water, sewer, gas, and electric) and any easements that run through your property. These features can significantly impact where you can build. Additionally, show any important natural features, such as large trees, streams, or wetlands. This is especially important for projects that involve a landscaping plan; to learn more about this, you can check out our guide on what a landscaping site plan is.
Step 3: The Tools for Creating a Site Plan – DIY vs. Professional
Once you have your information, you need to choose the right tools for the job. You essentially have two options: the DIY route or hiring a professional.
The DIY Approach: When It’s Possible to Do Your Own Site Plan
For very simple projects, such as a small shed or a fence, some municipalities may allow you to submit a hand-drawn sketch or a simple diagram created with basic software. The key to success with this approach is to be meticulous with your measurements and ensure you have not missed any local requirements. However, this method is almost never acceptable for larger, more complex projects that require a building permit.
The Professional Approach: The Smartest Path to Creating a Site Plan
For any project involving a building permit, hiring a professional service is the smartest path. An expert team has the software and knowledge to create a highly accurate, scaled, and permit-ready drawing. They can access the necessary GIS and parcel data, and their experience allows them to correctly interpret complex local codes, such as those in California or any other state. This approach saves you from costly delays and the stress of a rejected application.
Step 4: A Step-by-Step Guide to Creating a Site Plan
Here is a simplified workflow for creating a site plan for a building permit.
Step 1: Research Local Requirements for Creating a Site Plan
Every city and county has its own unique rules. Before you do anything else, visit your local municipality’s website or call their planning department. Ask them for a list of specific requirements for the type of project you are doing. This information is your roadmap. You can also review our general guide on how to get a site plan for a permit in the USA to get an idea of what to expect.
Step 2: Draft the Basemap for Your Site Plan
Using your property’s legal dimensions, a survey, or a plat map, create the outline of your property on a scaled drawing. Add the footprints of all existing structures to the drawing. This creates the foundational layer of your site plan.
Step 3: Add the Details and Proposed Changes for Creating a Site Plan
On this basemap, accurately draw in your proposed new structure or addition. Measure and label all setbacks from the proposed structure to the property lines and other buildings. Add the locations of all utilities, easements, and natural features. This is the stage where you also add any specific notes or details required by your local codes. This is also where you may discover a need for a conditional use permit.
Step 4: Final Review and Submission for Creating a Site Plan
Once your site plan is complete, perform a final review. Check that all dimensions are correct and that the drawing is to scale. Ensure you have included all the information requested by your local building department. For a professional drawing, a final check by another expert is a common practice. With a final, permit-ready drawing in hand, you are ready to submit it with the rest of your permit application. For a better understanding of what your professional plan will look like, you can learn how to read a site plan guide for homeowners.
Conclusion
Navigating the process of creating a site plan for your property is a critical step in any building project. By understanding the required components and following a systematic approach, you can ensure that your drawing is accurate, complete, and ready for submission. While the do-it-yourself approach might seem appealing, the risks of a rejected permit and costly delays often outweigh the initial savings. A professional, expert-crafted site plan is an investment in the success of your project, providing you with the peace of mind that your blueprint is sound and ready for approval.
Why Choose Site Plans Online USA
Navigating the complexities of building permits and drawing requirements can be overwhelming. At Site Plans Online, we are not just drafters; we are experts in the building permit process. We understand that every project, from a small deck to a new home, is unique and requires a tailored approach. Our commitment is to provide you with a professional, permit-ready site plan that meets or exceeds the specific requirements of your local jurisdiction.
- Nationwide Expertise, Local Compliance: Our team has extensive experience working with municipalities across all 50 U.S. states. We use the latest GIS and parcel data to ensure your drawing is accurate down to the last detail, no matter where your property is located. We are committed to staying current with the ever-changing codes and regulations, so you don’t have to.
- Speed and Efficiency: We know that time is money. That’s why we have streamlined our process to deliver high-quality site plans quickly, without the need for a physical site visit. By leveraging technology and our deep understanding of permit requirements, we eliminate the delays and guesswork that often come with traditional methods.
- Comprehensive and Professional Drawings: Our drawings are created to a professional standard, designed for clarity and precision. Each site plan includes all the required elements—from property lines and setbacks to utilities and easements—ensuring your application is complete the first time you submit it. We provide you with a product that building officials will respect and approve with confidence.
- A Partner in Your Project: We don’t just hand you a drawing; we provide a service. We are here to support you in your journey, offering expert guidance and a seamless process from your first inquiry to the moment your permit is approved.
Frequently Asked Questions
Q: Can I use a Google Maps screenshot for creating a site plan?
A: No, a Google Maps screenshot is not a substitute for a professional site plan. These images are not to scale and lack the essential, accurate data on property lines, setbacks, and other critical details required for a permit application. Using such an image will almost certainly result in a rejected application.
Q: What is GIS data and why is it important for creating a site plan?
A: GIS (Geographic Information System) data is a powerful tool that allows us to access and analyze spatial information about your property. It provides highly accurate data on property boundaries, zoning districts, and existing utilities. Using GIS data is a key part of our process, allowing us to create precise, permit-ready plans remotely without a physical site visit.
Q: How much does it cost to hire a professional to create a site plan?
A: The cost varies based on the size and complexity of your project. We offer clear, tiered pricing tailored to your specific needs. While the cost is an investment, it is often far less than the expenses associated with a rejected permit, which can include resubmission fees, redesign costs, and project delays.
Q: What is the typical turnaround time for creating a site plan?
A: Our standard turnaround time is typically a few business days. We are committed to a fast and efficient process to help you get your project started as quickly as possible.
Q: What should I do if I don’t have a land survey?A: A land survey is not always necessary. We can use GIS data and other public records to create an accurate site plan for most projects. However, if your property has unusual or unclear boundaries, a survey may be required by your local municipality. We can advise you on the best course of action after you provide us with your project details.